※参考)4inch HDMI Display-C – LCD wiki
【Pi4ユーザーは注意】
Pi4との相性が悪いんです。
Pi4の能力を生かそうと思うと、この画面は横表示にできない。
詳細理由は
1)こいつは、基本的に設計が縦型ディスプレイなので、90度回転しないといけない
2)回転機能(rotate)とPi4のOpenGLドライバーを同時使用できない。
3)(2)の結果、RetroPieでも考慮が必要。
   OpenGLを使用する前提でのインストールをしていると、emulationstationが動かなくなるっぽい。
   具体的にはインストール時に
     git fetch && git checkout fkms_rpi4
   を実施していると、OpenGLを使用する前提の構成で導入されるっぽいです。
   何を言っているかというとPi4である利点を1つ殺すことになるということになります。
4)横画面にした時のタッチ設定が面倒らしい(試していない)
Pi3B+以前ならそもそもOpenGL対応のチップなんてついていないんで問題ない。
またはPi4でも、縦利用するならいいと思う。
GPIO経由の3.5inchiディスプレイなら表示が遅いので、サーバのモニター画面程度の扱いだと思って我慢できるのだが、せっかくのHDMI+Pi4なのに普段使いでOpenGLの恩恵にあずかれないのはPi4の意味って何?ってなる。
だとすると、1インチ大きくて標準で横画面で800*600解像度の5インチディスプレイのほうが魅力になってしまう。
バスパワー駆動なんて自分でGPIOから引っ張ってくればいいですし、電源への要求のシビアさを考えるとPi4はそもそもGPIO経由で太い配線で余裕のあるスイッチング電源から供給したほうがいいと思いますし、冷却性能も確保するならディスプレイと本体は少し離したほうがいい。
そういう工作をするなら、もうすでに「ついで作業」(主に自動車の業界で、変更場所が同じような場所で、ついでにやってしまえ、という作業のこと)です。
そのうえで、それでも理由があって、工作は嫌、別体も嫌、ラズパイの上に乗っかってる小さい画面がいいんだ、Pi3で使うからいいんだ、OpenGLは使わないし悔しくないんだ、って話で割り切れるなら、いいと思います。
とりあえずタッチパネルを使わないならば以下の設定で行けます
【画面表示の設定】
これも(タッチパネル機能を使わなければ)基本的に/boot/config.txtの変更だけで行けます。
このディスプレイはHDMI接続でVSYNC60Hz,横480縦800なので、横にするには90度変更でrotate=1。
vc4-fkms-v3dは絶対外してくださいな。組み込むとrotateが効かなくなります(縦画面になる)。
/boot/config.txtのケツに以下をつければ大丈夫。
[pi4]
max_framebuffres=2
#dtoverlay=vc4-fkms-v3d

[all]
hdmi_force_hotplug=1
hdmi_force_edid_audio=1
display_rotate=1
config_hdmi_boost=7
hdmi_group=2
hdmi_mode=87
hdmi_drive=2
hdmi_cvt 480 800 60 6 0 0 0
【ちゃんとドライバーを入れよう】
以下のコマンドで導入でるらしいです。
うちのはタッチ機能がついていないので不明。
sudo rm -rf LCD-show
git clone https://github.com/goodtft/LCD-show.git

chmod -R 755 LCD-show
cd LCD-show/
sudo ./MPI4008-show
【以下無断引用(ぉ】
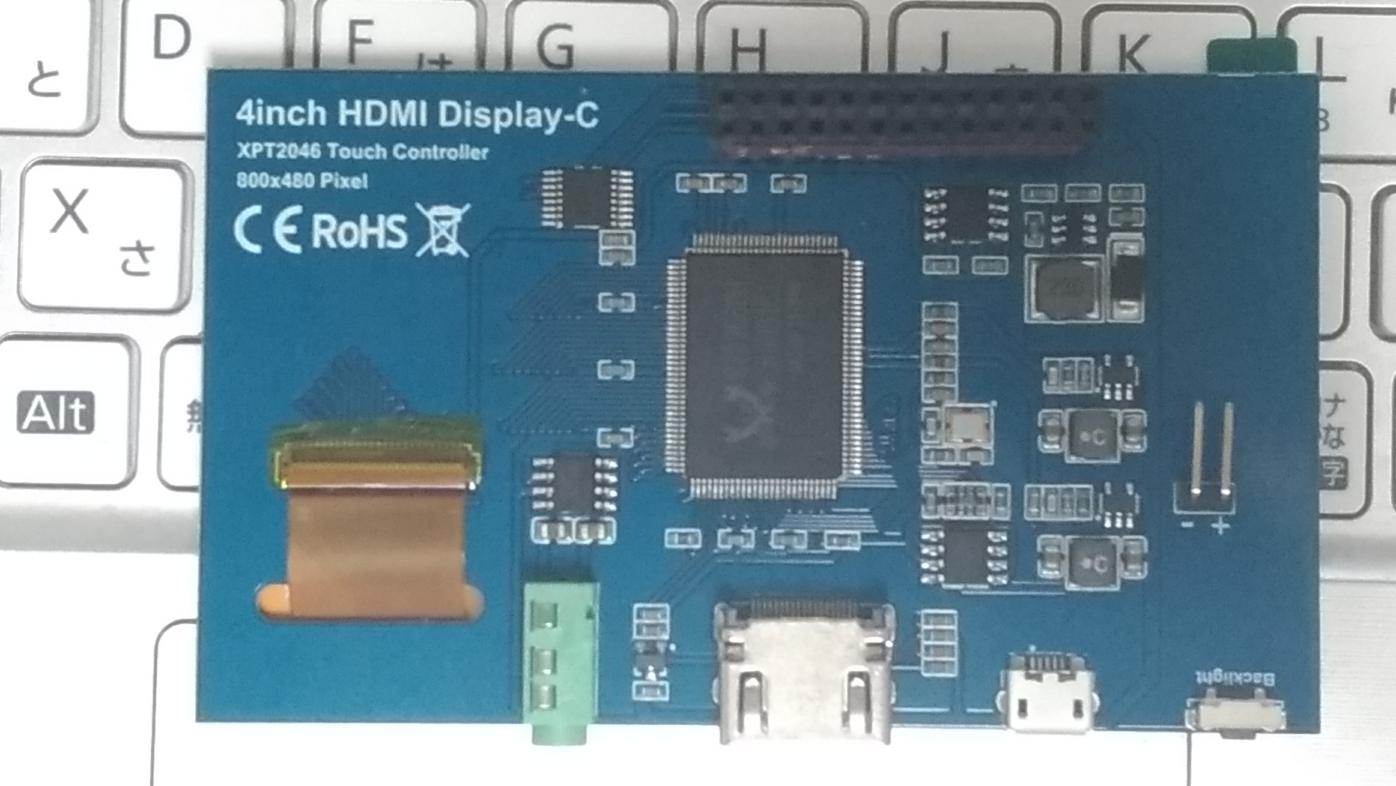
4inch HDMI Display-C
目次
[非表示]
- 1Product Pictures
- 2Product Description
- 3Product Parameters
- 4Hardware Description
- 5How to use Raspbian/Ubuntu Mate/Kali/Retropie system
- 6How to use as PC Monitor
- 7How to rotate the display direction
- 8Download Resources
Product Pictures


Product Description
- 4.0-inch IPS full-angle display, support HDMI input, refresh rate up to 60FPS
- The physical resolution is 800×480
- Raspberry Pi monitor with touch control (need to install touch driver)
- It can be used as standard HDMI output device for computer display(no touch function)
- Compatible with and can be directly inserted into all versions of raspberry PI motherboards (raspberry PI 1 generation B and Zero need additional HDMI cable)
- Support HDMI audio output, backlight brightness adjustable
Product Parameters
| SKU | MPI4008 |
| Screen Size | 4.0inch |
| LCD Type | TFT |
| Module Interface | HDMI |
| Resolution | 800*480 (Pixel) |
| Active Area | 51.84×86.40(mm) |
| Touch Screen Controller | XPT2046 |
| LCD Driver IC | NT35510 |
| Backlight | LED |
| power consumption | 0.16A*5V |
| Working temperature(℃) | -20~60 |
| Module PCB Size | 98.60*58.05 (mm) |
| Package Size | 143*134*51 (mm) |
| Rough Weight(Package containing) (g) | 126 (g) |
Hardware Description

① 3.5mm Headphone Jack: Output audio signal② HDMI:Used to connect the main board and LCD display for HDMI transmission③ Micro USB:Get 5V Power from USB, If ⑤-13*2 Pin Socket has been connected, that this USB interface can be No Connect.④ Backlight adjustment button: Short press backlight change 10%, long press a few seconds to close backlight; short press to open backlight⑤ 13*2 Pin Socket:Get +5V Power from raspberry Pi to LCD, at the same time transfer touch signal back to Raspberry Pi.13*2 Pin Socket interface definition:
| Pin | Name | Description |
| 1、17 | 3.3V | Power supply +3.3V |
| 2、4 | 5V | Power supply +5V |
| 3、5、7、8、10、11、12、13、15、16、18、24 | NC | NC |
| 6、9、14、20、25 | GND | GND |
| 19 | TP_SI | SPI data input of touch panel |
| 21 | TP_SO | SPI data output of touch panel |
| 22 | TP_IRQ | The touch panel is interrupted and the low level is detected when the touch panel is pressed down |
| 23 | TP_SCK | Touch the SPI clock signal of the panel |
| 26 | TP_CS | Touch panel select signal, low level select touch panel |
- Dimension drawing

How to use Raspbian/Ubuntu Mate/Kali/Retropie system
Method 1
- Use the image of the driver preinstalled
1) Download the driver image file from the website: Image_Download
2) Format Micro SD card by SDFormatter
3) Burn the official image into Micro SD card by using Win32DiskImager.
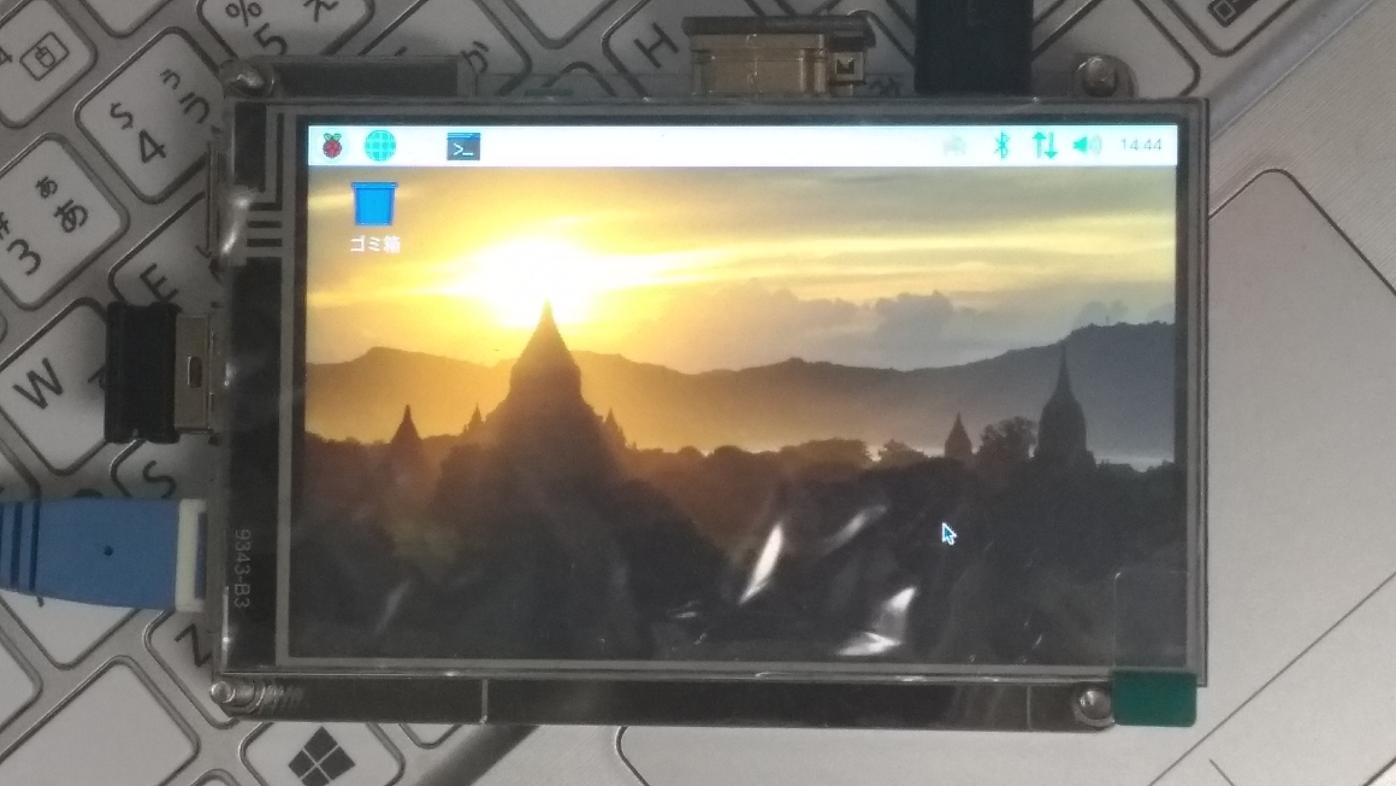
4) Insert Micro SD card, connect LCD, start Raspberry Pi, and it will work normally.
Method 2Step 1, install the latest official images of various systems(Q:Don‘t know how to install?)(1)Download from the official website
(2)Format Micro SD card by SDFormatter(3)Burn the official image into Micro SD card by using Win32DiskImager Step 2,Connect to Raspberry Pi
As shown in the figure, connect the LCD module to the Raspberry PiStep 3, Install the LCD driverA. Install drivers in the Raspbian system(Raspberry Pi requires Internet connection)(1)Log on to the Raspberry Pi terminal(User: pi; Password: raspberry) (Q:SSH cannot connect?)(2)Execute the following command (copy and paste it by right-clicking on the Putty window):
| sudo rm -rf LCD-show git clone https://github.com/goodtft/LCD-show.git chmod -R 755 LCD-show cd LCD-show/ sudo ./MPI4008-show |
B. Install drivers in the Ubuntu / Kali / RetroPie system(1)Download local drivers “LCD-show.tar.gz”Ubuntu-18.04-DriversKali-2019.1-DriversRetroPie-Pi2-Pi3-DriversRetroPie-Pi1-ZERO-Drivers(2)Copy “LCD-show.tar.gz” to the Raspberry Pi system(3)Log on to the Raspberry Pi terminal, Execute the following command ( Username Password)
| tar -xvzf LCD-show.tar.gz chmod -R 755 LCD-show cd LCD-show/ sudo ./MPI4008-show |
Step 4, Check whether the driver is installed successfullyAfter the installation of the LCD driver is completed, the system will restart automatically. If the LCD can be normally displayed and touched, the installation of the driver is successful
Note:A. Ubuntu system default SSH is not enabled, the specific method of opening seeRaspberryPi Ubuntu-mate open ssh instructionsB. Ubuntu-18.04 system ssh connection may fail, the specific solution is shown in RaspberryPi Ubuntu-mate-18.04 ssh connection failure solution descriptionC. The retropie-rpi1_zero system cannot log in via SSH (no network port and wifi module). You need to copy the driver through the serial port. For details, see RaspberryPi Zero open serial instructionsD. Retropie system game installation and setup instructions see RaspberryPi Retropie using instructions
How to use as PC Monitor
- Connected the computer HDMI output to the LCD HDMI interface by HDMI cable.
- Power to Micro USB interface
- If you have multiple monitors, please pull the other displayer, and make this LCD as the only displayer for testing.
- As computer monitors, the touch function will not be available.
How to rotate the display direction
This method only applies to the Raspberry Pi series of display screens, other display screens do not apply.
- Method 1,If the driver is not installed, execute the following command (Raspberry Pi needs to connected to the Internet):
sudo rm -rf LCD-show
git clone https://github.com/goodtft/LCD-show.git
chmod -R 755 LCD-show
cd LCD-show/
sudo ./XXX-show 90
After execution, the driver will be installed. The system will automatically restart, and the display screen will rotate 90 degrees to display and touch normally.
( ‘ XXX-show ‘ can be changed to the corresponding driver, and ‘ 90 ‘ can be changed to 0, 90, 180 and 270, respectively representing rotation angles of 0 degrees, 90 degrees, 180 degrees, 270 degrees)
- Method 2,If the driver is already installed, execute the following command:
cd LCD-show/
sudo ./rotate.sh 90
After execution, the system will automatically restart, and the display screen will rotate 90 degrees to display and touch normally.
( ‘ 90 ‘ can be changed to 0, 90, 180 and 270, respectively representing rotation angles of 0 degrees, 90 degrees, 180 degrees, 270 degrees)
If the rotate.sh prompt cannot be found, use Method 1 to install the latest drivers
Download Resources
- Documents
- MPI4008-4inch-HDMI-Display-C-User-Manual-V1.0.pdf
- How_to_install_the_LCD_driver_V1.2
- How_to_install_matchbox-keyboard
- How_to_calibrate_the_resistance_touch_screen-V1.2
- How_to_use_Raspberry_Pi(Download,Format,Burn,SSH,PuTTy)-V1.0.pdf
- How_to_change_display_direction-GPIO-Resistive_Touch-V1.2
- RaspberryPi Ubuntu-mate open ssh instructions
- RaspberryPi Ubuntu-mate-18.04 ssh connection failure solution description
- RaspberryPi Zero open serial instructions
- RaspberryPi Retropie using instructions
- Driver Download
- Image Download
If you have difficulty installing the driver, or if you still can’t use the display properly after installing the driver,Please Try our Configned images for tested.Just need download and write the image into the Micro SD card. DO NOT need any driver installation steps.
| Image Name | Version | Support | Password | Download | |
|---|---|---|---|---|---|
| Raspbian | 2021-03-04 | PI4/PI3B+/PI3/PI2/PI1/ZERO/ZERO W | user:pipassword:raspberry | BaiduYun: | MPI4008-4inch-2021-03-04-raspios-buster-armhf.7z Fetch Code:8elb |
| Mega: | MPI4008-4inch-2021-03-04-raspios-buster-armhf.7z | ||||
| Ubuntu MATE | 20.04.1-32bit | PI4,PI3B+,PI3B | user:pipassword:raspberry | BaiduYun: | MPI4008-4inch-ubuntu-mate-20.04.1-beta2-desktop-armhf+raspi.7z Fetch Code:f7pm |
| Mega: | MPI4008-4inch-ubuntu-mate-20.04.1-beta2-desktop-armhf+raspi.7z | ||||
| Kali Linux RaspberryPi 2, 3 and 4 | 2021.3 | PI4B,PI3B+,PI3,PI2 | user:kalipassword:kali | BaiduYun: | MPI4008-4inch-kali-linux-2021.3 Fetch Code:3ril |
| Mega: | MPI4008-4inch-kali-linux-2021.3 | ||||
| RetroPie | 4.4 | Pi1,Pi-ZERO | user:pipassword:raspberry | BaiduYun: | MPI4008-4inch-HDMI-C-retropie-4.4-rpi1-zero.7z Fetch Code:fgfw |
| Mega: | MPI4008-4inch-HDMI-C-retropie-4.4-rpi1-zero.7z | ||||
| RetroPie | 4.4 | Pi3B+,Pi3,Pi2 | user:pipassword:raspberry | BaiduYun: | MPI4008-4inch-HDMI-C-retropie-4.4-rpi2-rpi3.7z Fetch Code:jrkv |
| Mega: | MPI4008-4inch-HDMI-C-retropie-4.4-rpi2-rpi3.7z | ||||
| OctoPi | 0.18.0 | Pi4,Pi3B+,Pi3,Pi2 | user:pipassword:raspberry | BaiduYun: | 4inch-MPI4008-octopi-buster-armhf-lite-0.18.0 Fetch Code:me3s |
| Mega: | 4inch-MPI4008-octopi-buster-armhf-lite-0.18.0 |
- MD5 of Image
- Common Software